The Internet is a beautiful thing, but every rose has its thorn. One that bothers me in particular is the slow encroachment of Cancel Culture. The Internet was not designed as a tool for censorship, and the authors of its foundational protocols designed it with redundancy and fault-tolerance in mind.
The Internet interprets censorship as damage and routes around it.
— John Gilmour
When I introduced you to DNS, I glibly referred to domain name registrars as rent-seekers. It’s an appropriate characterization but didn’t describe the full meaning.
Plainly put, here’s the vulnerability — if someone can remove control over your domain name, you’re screwed.
My readers are highly technical, but even they would have a difficult time finding my content if bowtieddevil.com gets “cancelled”.
The problem with DNS is that all Web content is accessed through the domain name. The content hosted at a particular domain name can change at any time. You’ve probably seen this when a link to an old blog turns into a shady gambling website or a virus-ridden popup barrage. Every time you type a domain name into your browser, you’re at the mercy of DNS to point you towards the content you expect.
There are several alternative protocols that, when connected together appropriately, give you the robust content delivery of the traditional Web (TradWeb) with the censorship resistance and self-ownership of Web3.
In this tutorial I will present IPFS, with some basic discussion of ENS as a bonus.
Lowered Expectations
IPFS is still rather green, and I’ve experienced frequent timeouts and service outages while writing this. If any of the links below don’t work, please try again later. The web isn’t going to decentralize itself, so be aware that bugs and growing pains are part of the deal.
IPFS
IPFS (The InterPlanetary File System) describe themselves thusly:
A peer-to-peer hypermedia protocol designed to preserve and grow humanity’s knowledge by making the web upgradeable, resilient, and more open.
IPFS is a file storage protocol and a content distribution network. It functions in a wholly different way from the TradWeb in some critical ways:
- Instead of content being primarily delivered via a domain name (TradWeb), IPFS delivers content with a unique hashed CID (Content IDentifier). In this way, queries to the IPFS network request a specific piece of content only. They otherwise do not care about where that content is stored and who provides it. This is useful because IPFS is a peer-to-peer network, thus the content may be stored on one more more nodes at any given time.
- Content stored on IPFS is inherently versioned, which means that updated content is given a new hashed CID at the time of publishing. This is completely different from the TradWeb approach where the “last published” version of a web page is canonical. TradWeb pages can be captured and reviewed using tools like archive.org, but otherwise the latest is the greatest is the only.
IPFS Pros
- With TradWeb, if a server hosting content behind a domain name goes down, the content is unreachable until it returns. User error or network outage results in the same message to your users — 404 Not Found. With IPFS, the original author of the content may be offline but if a node has that content cached, it can be distributed as usual. An offline server will not bring down an IPFS website.
- With TradWeb, adding failover capability requires that you control all of the destination endpoints (scales linearly). With IPFS, anyone can act as a mirror for your content without needing access (scales geometrically).
IPFS Cons
- IPFS (via the
ipfs://URI) is not natively supported in all browsers. - IPFS is relatively new and essentially unknown to normies.
- Sending someone a list of CIDs is the definition of user-unfriendly.
- After 40 years of Internet experience, we’re pretty accustomed to how domain names work. Switching to a content-addressing system will take some mental rewiring.
- Updating and revising content on IPFS can be clunky, since you can’t just correct a typo and re-publish. The built-in versioning feature creates a new CID with every change you make, so it’s difficult to provide predictable static addressing for content that changes frequently.
- Since IPFS network delivery is dynamic, the content must be “standalone”. Dynamic content generated by a PHP script and a local SQL database (a la WordPress) will not work correctly, since it relies on the server to preprocess that data. Client-side dynamic content (generating content by reading from a publicly-accessible database with an HTTP API) will work, however.
They Thought of Everything
Luckily for us, the cons have rather elegant solutions:
- Lack of IPFS-native browsers is solved through IPFS Gateways
- The “latest” version of content can be tagged with the IPNS (IPFS Naming System) for easy sharing without needing to share a CID directly. They also provide a hook that works directly with DNS called DNSLink, allowing your IPFS content to be accessed through a gateway using an existing TradWeb domain name.
- PHP/Perl-based content systems have declined in popularity since their introduction decades ago. Javascript frameworks are very popular right now, and IPFS-compatible static and dynamic websites are easier than ever to create without needing to run a local database. I built this blog using a static site generator (Hugo) for exactly this reason.
IPFS Gateways
Because our “mental shorthand” for Internet content is via a browser, the IPFS team has introduced the concept of a Gateway. An IPFS Gateway is simply a webserver that listens on the TradWeb and pulls the relevant data from the IPFS network.
Using an IPFS gateways allows you to share a link that will work for everyone, everywhere.
IPNS — the IPFS Naming System
If the CID of a particular piece of content is expected to change (blog posts, live news feed, a work-in-progress text document), you can associate it with a static IPNS entry that will store the CID of the “latest” version. This behaves very similar to TradWeb, where a static domain name will point to the latest version of a particular piece of content.
DNSLink — TradWeb DNS Integration
A simple TXT record can be added to your DNS with the format "dnslink=[IPFS path]". The [IPFS path] can be an /ipfs/[CID] hash or an /ipns/example.dom domain name alias.
We will cover this later in the Examples section.
Setup
Desktop Client
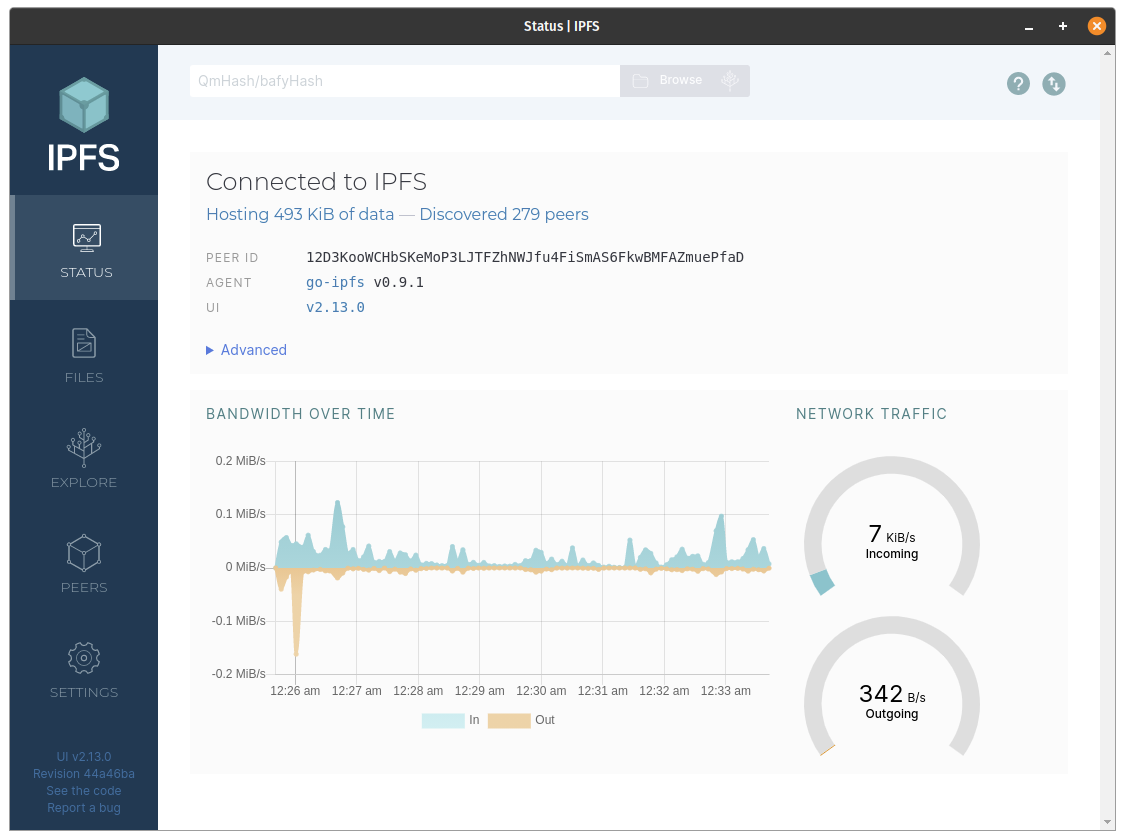
IPFS offers a few options for installation. The most straightforward is the desktop client, which bundles a node, file manager, peer manager, and content explorer into a single application. I will cover IPFS at the server level in a future tutorial, but this will be sufficient to show the concepts.
Install it on your machine, then start it up.
Network Configuration
The documentation for this is poor, but I recommend that you configure a port forward inside your router for port 4001 on TCP & UDP. If you’re running a full IPv6 stack this may not be necessary, and file discovery seems to work correctly behind IPv4 NAT (Network Address Translation) albeit very slowly.
IPFS Desktop will automatically configure a port forwarding if your router offers uPNP.
For maximum performance, I recommend hand-configuring the port 4001 forward. A very helpful site for this is portforward.com.
Browser Plugin
If you’d like to interact with IPFS natively, you can use Brave Browser or install the IPFS Companion plugin for the major browsers (Firefox, Chrome, Opera, Edge). Note that the plugin requires an IPFS node to run properly.
Examples
Adding a File with IPFS Desktop
Let’s do a very simple test, generating a simple text file and uploading it to IPFS.
On the console, I create a file with the following command: echo "My wacky IPFS decentralization plan has worked!" > ipfs.txt
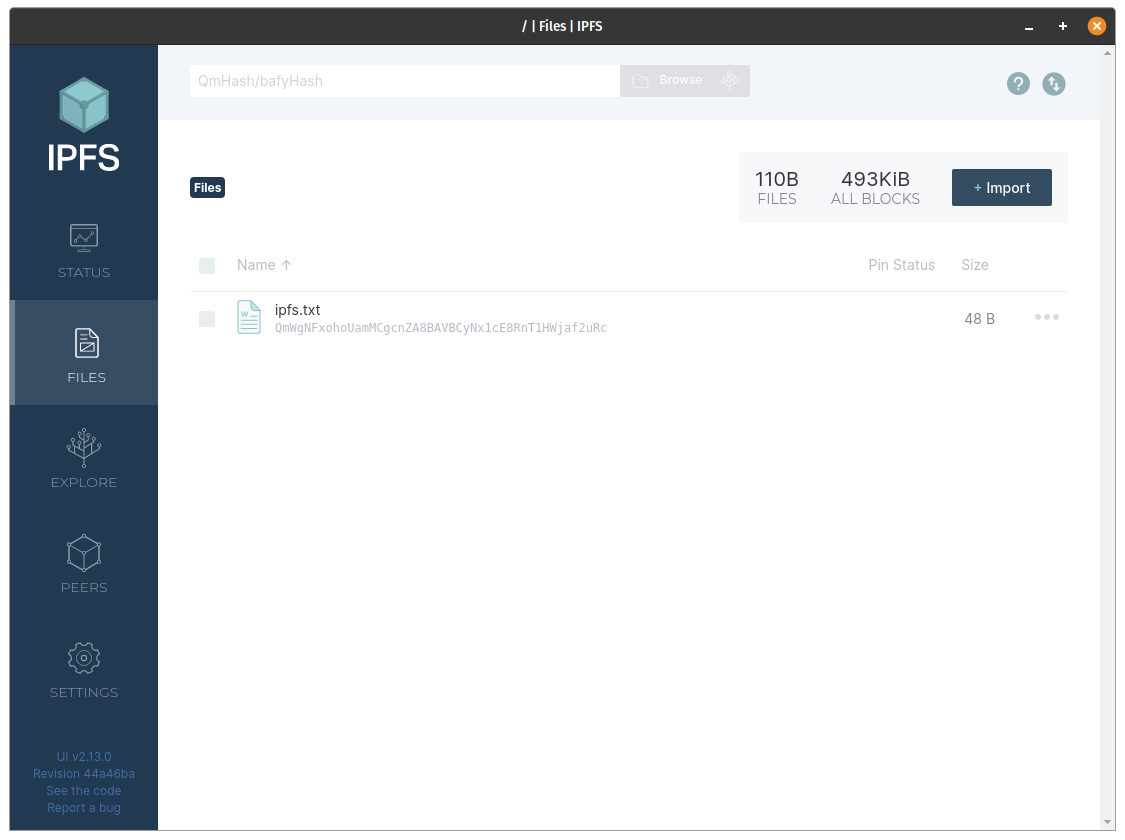
Then, inside IPFS Desktop, navigate to the FILES tab and click + Import.
Select ipfs.txt and upload it. IPFS Desktop shows that the CID for this content is QmWgNFxohoUamMCgcnZA8BAVBCyNx1cE8RnT1HWjaf2uRc.
Now, visit https://ipfs.io/ipfs/QmWgNFxohoUamMCgcnZA8BAVBCyNx1cE8RnT1HWjaf2uRc?filename=ipfs.txt and see if the file is accessible.
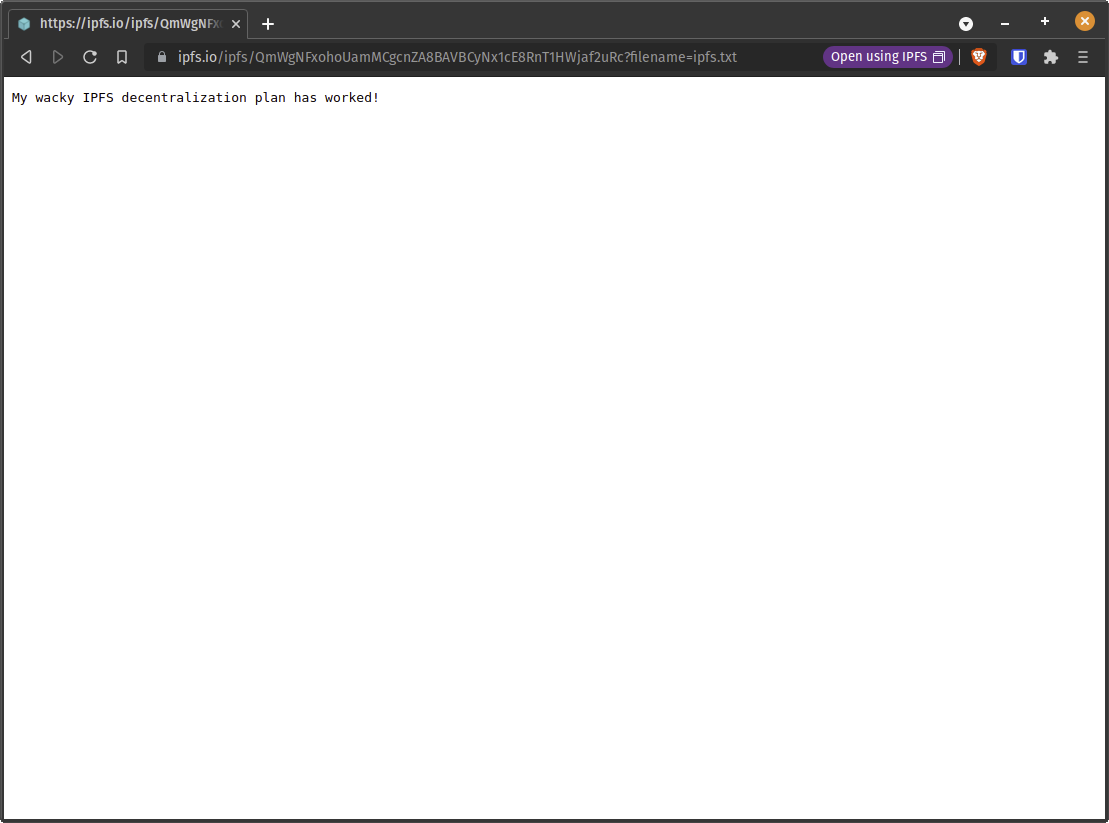 It’s live!
Pinning a File
Pinning is an IPFS action that permanently saves a file’s content to your node. For popular content that is routed between multiple nodes, that content is saved temporarily (cached) to speed up future requests. For content that is infrequently accessed, IPFS will often have to request it from the original node. By getting your content pinned by other nodes, you increase the speed, the redundancy, and the scalability of access to that content.
Any node can choose to pin a file, which is where the scalability of IPFS begins to emerge. Content with multiple pins can be extremely resilient to censorship, since there is no longer a single point of failure (a domain name or the server itself).
Third Party Pinning
The most popular IPFS pinning service is Pinata, which allows you to pin content to their servers. At time of writing, Pinata offers a free plan for 1GB of pinned storage, and scaling paid plans for larger storage options.
Content can be pinned directly by re-uploading it to Pinata, or by giving them an appropriate IPFS identifier (CID or IPNS).
IPFS Daemon
The IPFS Daemon offers more control and options, compared to IPFS Desktop. Anyone looking to publish a whole website to IPFS should set this up.
IPFS publishes their official server client in a Docker Container, so we’ll use that here.
I have created the following docker-compose.yml in the directory /docker/ipfs:
version: "2"

services:
  ipfs:
    image: ipfs/go-ipfs:latest
    container_name: ipfs
    restart: unless-stopped
    ports:
      - "4001:4001/tcp"
      - "4001:4001/udp"
    volumes:
      - data:/data/ipfs
      - /mnt/vps/blog/bowtieddevil/public:/pinned/blog
      - /home/devil/degenimals/assets:/pinned/degenimals

volumes:
  data:
Note that I’ve attached two volumes to this container. The first is a remote directory that contains the content for bowtieddevil.com, and the second is a directory of Degenimals NFT assets that I pull using the asset script I wrote in Introduction to Shell Scripting.
Bring up the container using docker-compose up -d and let’s start pinning.
Publishing the Degenimals
First check that the container is connected using docker exec ipfs ipfs swarm peers, which should print a long list of IPv4 addresses. Since Docker does not support IPv6 by default, you should not find any IPv6 peers listed here.
If that’s all working, let’s pin some content. Pin the Degenimals content with docker exec ipfs ipfs add -r /pinned/degenimals remembering that /pinned/degenimals is the directory inside our container where those assets are attached.
Note that the add function pins content by default, so there is no additional step.
That should print out a lot of data, which I won’t reprint here. Each line will show a total file transfer size, a CID, and a file or directory name. At the end, IPFS will print a CID for the complete directory. Viewing it with an IPFS Gateway will show you a directory view of everything you just uploaded.
Let’s verify one piece of content to be sure.
In honor of BowTiedBull, let’s verify that the official avatar image shows up correctly on IPFS. The CID is QmdkSRhBdNc4JosE14ZHFn6W18GK9kCjXnwikF6uZdNYUv, so we can visit https://ipfs.io/ipfs/QmdkSRhBdNc4JosE14ZHFn6W18GK9kCjXnwikF6uZdNYUv to confirm that the content is available.
Publishing the Blog
Now I’ll test pinning my blog content to IPFS by running docker exec ipfs ipfs add -r /pinned/blog.
The CID of the individual files aren’t important to me, but I take note of the final line, which reads:
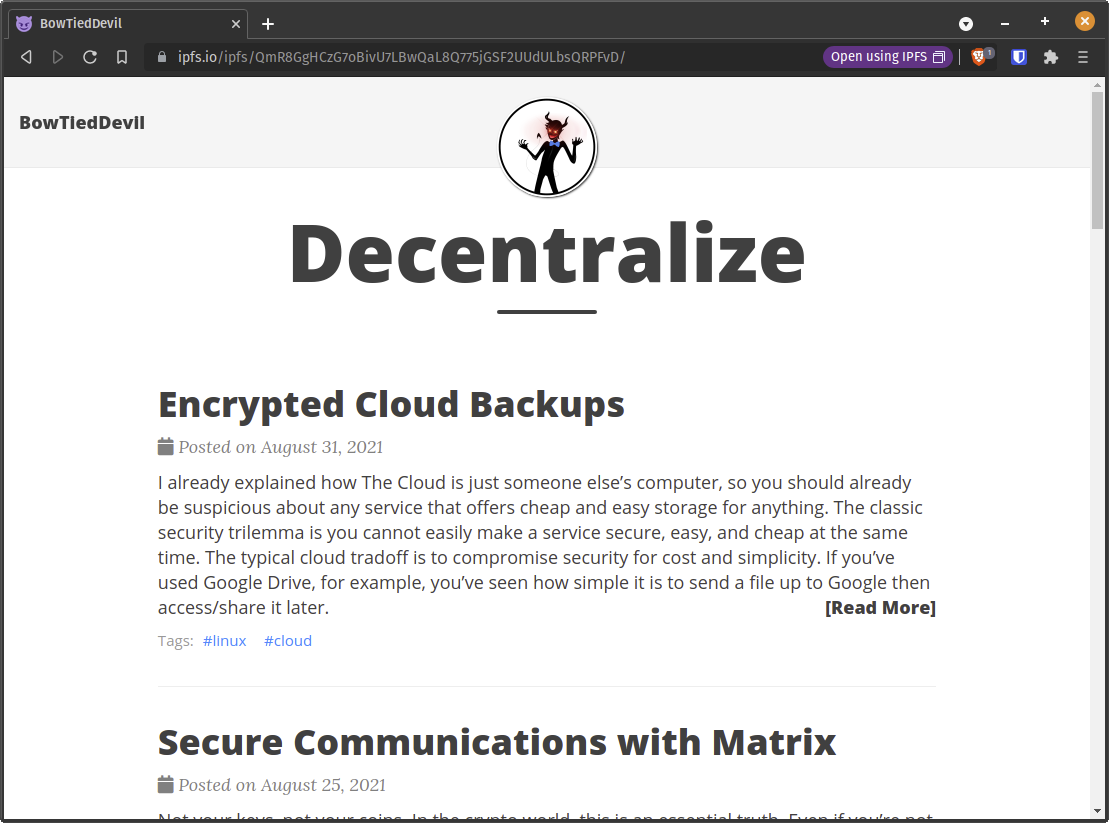
added QmR8GgHCzG7oBivU7LBwQaL8Q775jGSF2UUdULbsQRPFvD blog
The final CID (QmR8GgHCzG7oBivU7LBwQaL8Q775jGSF2UUdULbsQRPFvD) is the so-called “pointer” to the blog. If I visit https://ipfs.io/ipfs/QmR8GgHCzG7oBivU7LBwQaL8Q775jGSF2UUdULbsQRPFvD, I see the front page of my blog exactly, except it’s served completely through IPFS. Cool!
Setting an IPNS
Now that my blog content has been published and is accessible over IPFS, I want to solve the “versioned content” problem. Whenever I make an edit to anything on the blog, it will generate a new top-level CID. If I want you to always see the updated version of my blog, I need to give you a fixed pointer to use that always updates.
IPNS solves that problem, and I’ll create an IPNS handle using the top-level CID above.
root@hades:/docker/ipfs# docker exec ipfs ipfs name publish QmR8GgHCzG7oBivU7LBwQmR8GgHCzG7oBivU7LBwQaL8Q775jGSF2UUdULbsQRPFvD
Published to k51qzi5uqu5dm736m1ya40rrcaqcus1pycrniqvzcsyszu1cvdb93x2uhhb0qt: /ipfs/QmR8GgHCzG7oBivU7LBwQaL8Q775jGSF2UUdULbsQRPFvD
This tells me that the previous IPFS hash (/ipfs/QmR8GgHCzG7oBivU7LBwQaL8Q775jGSF2UUdULbsQRPFvD) has a permanent IPNS handle (/ipns/k51qzi5uqu5dm736m1ya40rrcaqcus1pycrniqvzcsyszu1cvdb93x2uhhb0qt: /ipfs/QmR8GgHCzG7oBivU7LBwQaL8Q775jGSF2UUdULbsQRPFvD).
I can use this IPNS just like I did before with an IPFS Gateway. Test it at https://ipfs.io/ipns/k51qzi5uqu5dm736m1ya40rrcaqcus1pycrniqvzcsyszu1cvdb93x2uhhb0qt.
Result:

Same as before, except now with IPNS! Take careful note of the /ipns/ path above.
OK, one more step before the big reveal.
I make a small edit to a post (adding a smiley face at the end of the First Post), run Hugo again to generate the new static page, then re-add the /pinned/blog folder to IPFS.
I won’t copy/paste the steps again (see above), but the important output occurs at the end of the ipfs add command, where it gives me a new CID for the top-level blog directory.
In this case, the new CID is QmXBDrsbPyDb856NqN3KLbUqoF1w8hEwheFbGQo6Y7jYZi. This is different from the last one, but pay attention to this.
root@hades:/docker/ipfs# docker exec ipfs ipfs name publish QmXBDrsbPyDb856NqN3KLbUqoF1w8hEwheFbGQo6Y7jYZi
Published to k51qzi5uqu5dm736m1ya40rrcaqcus1pycrniqvzcsyszu1cvdb93x2uhhb0qt: /ipfs/QmXBDrsbPyDb856NqN3KLbUqoF1w8hEwheFbGQo6Y7jYZi
Very subtle, but notice that the IPNS hash of the new content CID is k51qzi5uqu5dm736m1ya40rrcaqcus1pycrniqvzcsyszu1cvdb93x2uhhb0qt. Exactly the same as before!
The IPFS daemon keeps track of the pinned content and re-assigns the same IPNS when an update is made.
This ensures that if I always maintain the IPNS link when I make edits, I can use a fixed reference to my “latest” content.
ENS Integration
Here is where the beauty of Web3 comes in. Nobody is going to remember the IPNS for my blog content since it’s just a big jumble of letters and numbers.
With ENS (Ethereum Naming System), they don’t have to!
If you haven’t already set up an ENS domain (with a .eth extension), visit ENS Domains to obtain one.
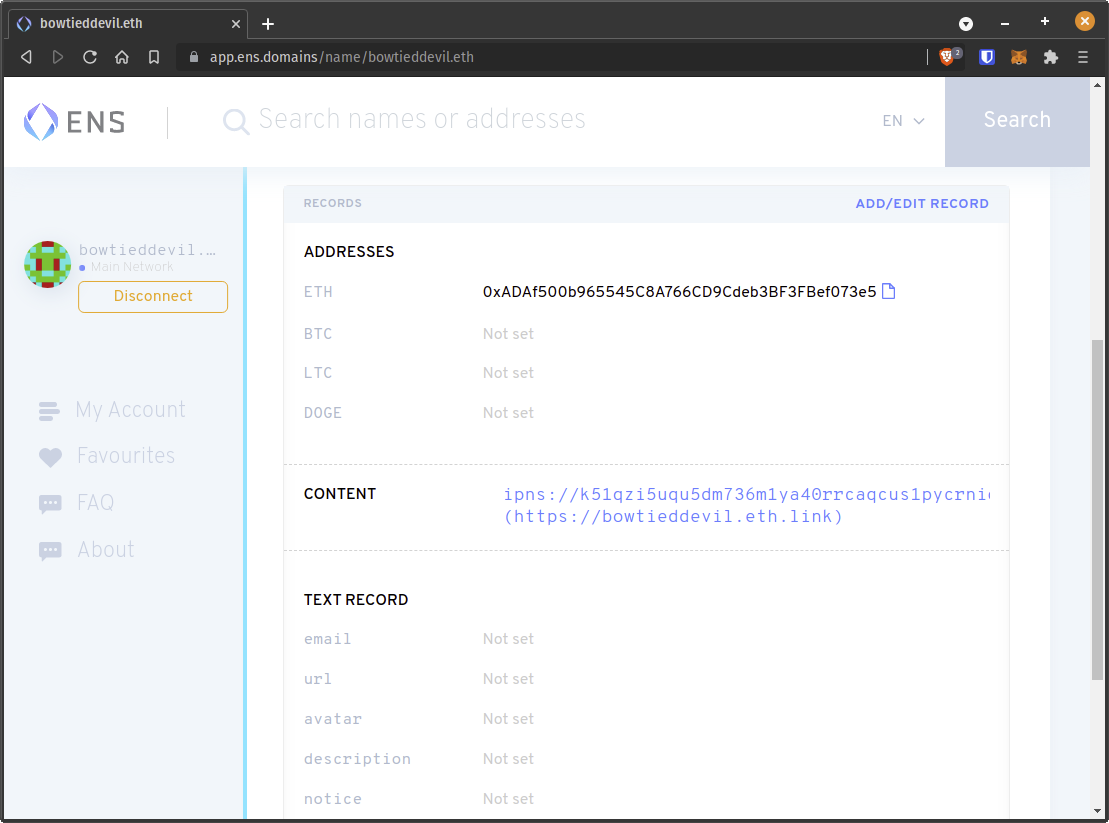
The nice feature of an ENS domain is that it allows you to set metadata for that address. The obvious ones are Twitter/Github names, website URL, and ETH/BTC addresses. A lesser-known feature is the “Content” section, which allows you to specify some alternative URI pattern.
We can set an IPFS or IPNS address, for example, sending people to ipns://bowtieddevil.eth instead of ipns://k51qzi5uqu5dm736m1ya40rrcaqcus1pycrniqvzcsyszu1cvdb93x2uhhb0qt. Note that both addresses are equivalent if the “Content” section is set to match that IPNS address.
I have an ENS address (bowtieddevil.eth), so I’ve set the “Content” section to the value ipns://k51qzi5uqu5dm736m1ya40rrcaqcus1pycrniqvzcsyszu1cvdb93x2uhhb0qt.
After setting this, I can load ipns://bowtieddevil.eth in the Brave Browser and read my blog completely over IPFS.
Note that this is a completely decentralized way to publish content. I do not need a traditional DNS domain name at all! I simply need an ENS domain and an IPFS record to point to and I’m set.
I can also use the IPFS Gateway feature by visiting ipns://ipfs.io/ipns/bowtieddevil.eth. This will work on any browser.
DNSLink
DNSLink is a bit like the IPNS/ENS strategy above, except that it relies on the traditional DNS system.
Since it uses DNS, it’s vulnerable in the same way that TradWeb is. However it’s much more user-friendly and cheaper, since you don’t need to pay for an ENS domain or pay any gas fees.
To set a DNSLink, add a TXT record to your DNS with the key _dnslink and value dnslink=/ipns/k51qzi5uqu5dm736m1ya40rrcaqcus1pycrniqvzcsyszu1cvdb93x2uhhb0qt (or your own equivalent.
Then you can view content using ipns://bowtieddevil.com or ipns://ipfs.io/ipns/bowtieddevil.com
Note that the DNSLink format is slightly more user-friendly, since it has the familiar domain name that you’re already using.
The content is still the same after retrieval on IPFS, but different audiences have different degrees of comfort with things this “outside the box”.