The previous post about Self-Hosted Password Managers was well received, and it brought up some interesting discussion on Twitter. A common takeaway was the importance of two-factor authentication (2FA for short).
Two-factor authentication is a system whereby a login system verifies with a separate and unrelated login system. Log into system #1 and verify that you’re truly the correct user by verifying with a pre-configured integration with system #2. Et voila!, two factors combine to authenticate you.
The most common 2FA method is a one-time confirmation code via phone text message, but this approach has big problems.
Your phone can be stolen and many text messaging apps will display the full message on the lock screen without requiring a password. Obvious vulnerability!
What’s worse is that text messages can be faked (they often arrive from random numbers with no way to verify the sender), and your phone number can be temporarily “stolen” by SIM spoofing. I won’t cover the details of this attack here, but please understand that SMS 2FA is flimsy.
We have very little control over how 3rd parties choose to implement 2FA, but we can follow good practices with our own self-hosted infrastructure.
Authelia
Authelia is, in their own words, an open source authentication and authorization server protecting modern web applications by collaborating with reverse proxies such as NGINX, Traefik and HAProxy.
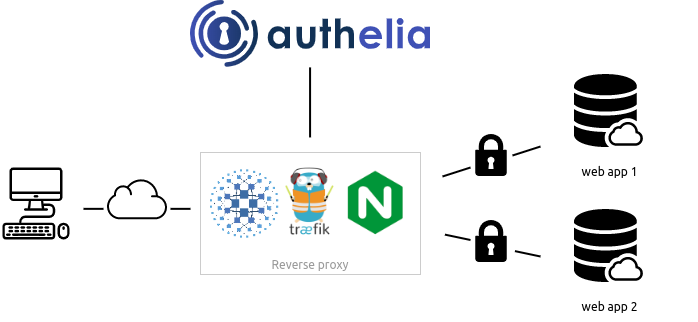
It sits behind your reverse proxy and (optionally) intercepts requests to any configured web path. After authentication, it will redirect to the appropriate service.
Many self-hosted services come with authentication mechanisms, but it’s rare that they include 2FA. And if they do, they often don’t support the ones you want.
Here’s where Authelia comes in. It supports the following 2FA methods:
- Time-Based One-Time Passwords
- Hardware Security Keys
- Push Notification
I will only cover the Time-Based One-Time Password (TOTP) approach here, but if you have a Yubikey or use Duo for mobile push notifications Authelia will satisfy you as well. You can even configure all three, if you’d prefer different options at login time.
TOTP
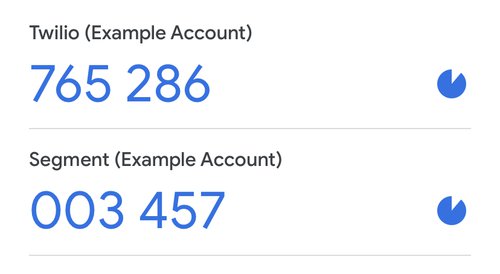
If you’ve ever used Google Authenticator, you’ve seen a TOTP. It is a six-digit string that resets every 30 seconds. Log into Google (or another service), confirm with your latest TOTP, and you’re set.
Setup
This guide will demonstrate how to configure Authelia with Traefik, my favorite Docker reverse proxy. The wonderful thing about Authelia is that it hooks directly into Traefik as a middleware, so after setup it’s trivially easy to protect a running service with 2FA.
If you have not read my guide to reverse proxies, please go do that now.
Docker
The Authelia Github contains an example configuration that is useful but somewhat clunky. For starters, it includes a complete Traefik stack and a few example containers. I am already working with a functioning Traefik setup, and you likely are too.
Instead, I have modified and whittled down the unnecessary bits.
The docker-compose.yml file is saved inside /docker/authelia, and all other configuration files are saved inside /docker/authelia/config. You are free to create and populate a named docker volume if you’d like.
docker-compose.yml
version: '2'

services:
  authelia:
    image: authelia/authelia:4
    container_name: authelia
    volumes:
      - ./config:/config
    labels:
      - traefik.enable=true
      - traefik.http.routers.authelia.rule=Host(`auth.bowtieddevil.com`)
      - traefik.http.routers.authelia.entrypoints=websecure
      - traefik.http.middlewares.authelia.forwardauth.address=http://authelia:9091/api/verify?rd=https://auth.bowtieddevil.com
      - traefik.http.middlewares.authelia.forwardauth.trustForwardHeader=true
      - traefik.http.middlewares.authelia.forwardauth.authResponseHeaders=Remote-User,Remote-Groups,Remote-Name,Remote-Email
    restart: unless-stopped
    environment:
      - TZ=America/Los_Angeles

networks:
  default:
    name: authelia
configuration.yml
theme: dark
jwt_secret: SomeLongRandomStringOfCharacters

server:
  host: 0.0.0.0
  port: 9091

totp:
  issuer: auth.bowtieddevil.com

authentication_backend:
  file:
    path: /config/users_database.yml

access_control:
  default_policy: deny
  rules:
    - domain: mautic.bowtieddevil.com
      policy: bypass
 resources: "^.*/form/.*$"
    - domain: mautic.bowtieddevil.com
      policy: two_factor

session:
  name: authelia_session
  secret: unsecure_session_secret
  expiration: 3600  # 1 hour
  inactivity: 300  # 5 minutes
  domain: bowtieddevil.com

regulation:
  max_retries: 3
  find_time: 120
  ban_time: 300

storage:
  local:
    path: /config/db.sqlite3

notifier:
  smtp:
    host: [redacted]
    port: 587
    username: [redacted]
    password: [redacted]
    sender: [email protected]
    subject: "[Authelia] {title}"
users_database.yml
users:
  devil:
    displayname: "Bowtied Devil"
    password: "$argon2id$v=19$m=65536,t=1,p=8$ZU1ySHlCTVVhaGlzRjdYcw$3S79KNBgnWhdriBwR7tgSVwWnNSRSyViIS7uzxTzVdo"
    email: [email protected]
    groups:
      - admins
      - dev
Some notes on the files above:
- I have used
auth.bowtieddevil.com, edit as desired indocker-compose.ymlandconfiguration.ymland be sure they match. - Set the timezone variable
TZto match your system. You can look up yours HERE. - The username and password are saved in a YML file, and the database is an SQLite file on local storage. This is OK for a small local setup, but I recommend using an SQL database if you intend to use Authelia in a high-availability application. The Authelia Storage documentation describes these options.
- The password is hashed using the argon2id version 19 with salt. Instead of saving the password directly, you store the hash. To find the hash, run the following:
docker exec -it authelia authelia hash-password SomeLongPasswordand save the resulting text string in the file above. It will begin with$argon2id$if you’ve done it correctly. - I have added the
traefikcontainer to theauthelianetwork so it can pass traffic to it as needed. Authelia does not communicate directly with any of the protected reverse proxies services, so it only needs to network with Traefik. - In the
access_controlsection, I have defined themautic.bowtieddevil.comdomain with thetwo_factorpolicy. This means that Authelia expects a login followed by a 2FA method (TOTP in my case). You may usebypassfor any website that does not require any Authelia interaction, orone_factorfor any website that you want to protect with a username/password only. Note that a previous successful 2FA login will be valid for other websites for a time (Authelia tracks sessions with a cookie that expires after some time). - I have set up SMTP (email) as my notifier. If you need a setup guide for this, please read Sending Email and Receiving Email.
- The Newsletter Signup form that I’ve set up through Mautic is embedded through the
mautic.bowtieddevil.comdomain, so I have written a special rule that bypasses Authelia for all URL resources that include the string/form/. The rest of the string represents a regular expression (aka regex). Regex is beyond the scope of this post, so please get in touch with me on Twitter or email me if you need to write a special exemption for certain parts of your website.
Adding 2FA to Mautic
I will add 2FA to the Mautic installation from a previous post. Mautic can send and receive email, and it maintains a list of my newsletter contacts, so I don’t want this to be compromised!
With Authelia and Traefik already running, protecting Mautic is simple.
All I need to do is add a label to the service specifying that Traefik should use the Authelia middleware.
Simply include the following line in the labels section:
- traefik.http.routers.mautic.middlewares=authelia@docker
And that’s that!
Testing
Visiting mautic.bowtieddevil.com in my browser, I see it immediately redirect me to an Authelia login screen. I enter devil as my user, and my password.
It prompts me for a TOTP 2FA, which I can set up using my phone app and the QR code. Note that I use Aegis instead of Google Authenticator, since it allows me to export the seed instead of relying on Google. The apps otherwise work the same, so I leave the app choice to you.
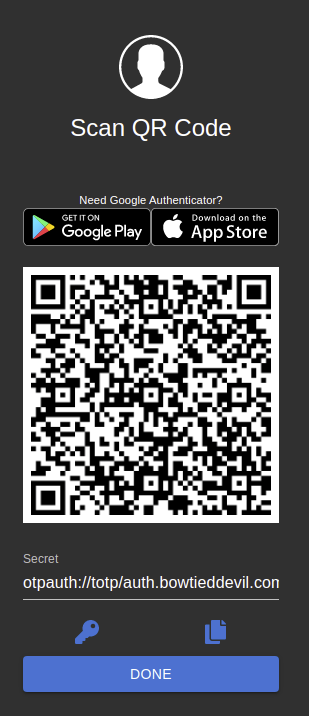
Security Note: The QR code above was temporary, and I have since thrown it away and replaced it. Never share your QR codes with anyone, since they contain the seed to your TOTP keys. Lose this and your codes are compromised forever.
Then I go back to mautic.bowtieddevil.com, login, then enter the TOTP from my app.
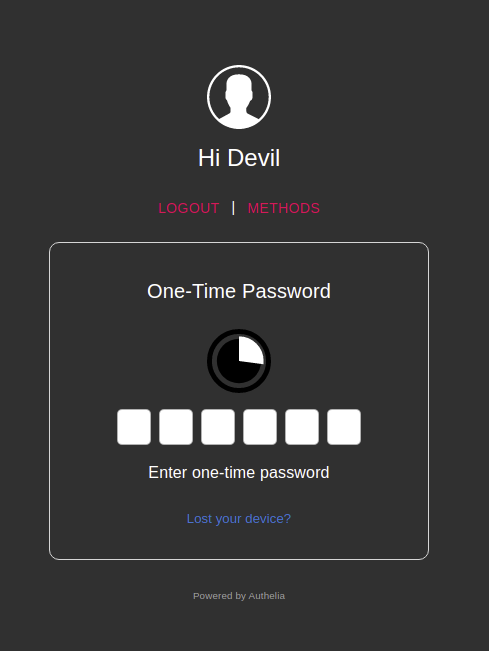
After entering this code, Authelia redirects me to Mautic where I can use it normally.
Thanks Authelia, you’re the best!