We learned about virtual machines earlier, which will give you a decent foundation for containers.
The virtual machine approach is wonderful when you want to maintain strict separation between different operating systems. It dedicates storage, memory, and CPU to the VM, so that “power” is effectively taken from the host OS.
The guest OS (inside the VM) runs its own complete stack, from the kernel all the way up to the user interface components.
Let’s say you have a Linux computer, and you create a VM on it. On that VM you install another Linux. Now you have two kernels, two networking stacks, and possibly two desktop environments.
Sounds like a lot of overhead, yes? Especially if you only wanted to isolate a few things in the VM.
A container works differently. Where the VM needs a complete software stack to operate, the container relies on the host for all processing, execution, and memory management. It therefore can be stripped of all non-essential components. Plus, it doesn’t require any resources (CPU & Memory) to be completely dedicated to it. A container’s memory use may go up or down during its lifetime, but free resources are usable by the host OS instead of being tied up.
Since a container is dependent on the host OS for nearly everything, it must be managed by an abstraction layer or service running on the host. The host talks to the service, and the service talks to the container.
Containers are typically isolated from each other in the following ways:
- Cannot pass network traffic between themselves
- Cannot access storage owned by another container
- Cannot read anything in memory used by another container
- The container itself is ephemeral, and may be killed and thrown away at any time without affecting the system. The data associated with that container can be persistent if you desire, or they can be created for a short time, perform some function, then be removed.
A container will typically run a single main process, so it is therefore very lightweight. Running multiple VMs is heavy, but multiple containers is a breeze.
Docker
Of all the container solutions, Docker is the most well-known and popular. They maintain a huge repository of pre-built containers at Docker Hub which you can browse.
Why Use Docker?
Containerizing my applications performs several important functions:
- It allows me to use containers that are published by the project authors themselves, which typically receive more frequent bug-fixes. Containers are not packaged by the distribution package team (Ubuntu in our case, there are hundreds of others), and otherwise do not interact with the OS’s built-in configuration management, ensuring zero conflicts with libraries.
- Since a container is OS-agnostic and comes with all required dependencies rolled into the image, it will run on any Linux system regardless of version.
- Docker runs on Windows, Mac, and Linux. Even if you don’t want to go full Linux nerd like me, you can still use Docker.
- The configuration for Docker packages is done with a text-based file, which is easily backed up.
- The configuration for a Docker-based system can be easily exported, sent over
scp(see secure shell), and re-installed on another system in minutes. - Networking is simplified, which is helpful when running multiple web services that use the same ports.
- If you get deep into the weeds with running Internet services, you can learn Kubernetes, which is a tool for managing multiple containers across multiple hosts to provide redundancy, fault-tolerance, and failover capability. Kubernetes is built to manage Docker containers. I will cover Kubernetes much later, it’s a very advanced topic (TO-DO REMINDER).
Installing Docker
Open a terminal and install with apt:
devil@ubuntuVM:~$ sudo apt install docker docker-compose
The following NEW packages will be installed:
  bridge-utils containerd docker docker-compose docker.io git git-man liberror-perl pigz python3-attr python3-cached-property
  python3-distutils python3-docker python3-dockerpty python3-docopt python3-importlib-metadata python3-jsonschema
  python3-more-itertools python3-pyrsistent python3-setuptools python3-texttable python3-websocket python3-zipp runc
  ubuntu-fan wmdocker
0 upgraded, 26 newly installed, 0 to remove and 2 not upgraded.
Need to get 74.4 MB/78.6 MB of archives.
After this operation, 395 MB of additional disk space will be used.
Do you want to continue? [Y/n] y
[more output below]
Now check that the Docker service is running:
devil@ubuntuVM:~$ sudo systemctl status docker
● docker.service - Docker Application Container Engine
         Loaded: loaded (/lib/systemd/system/docker.service; enabled; vendor preset>
     Active: active (running) since Thu 2021-07-01 16:14:33 PDT; 7min ago
TriggeredBy: ● docker.socket
       Docs: https://docs.docker.com
   Main PID: 865 (dockerd)
      Tasks: 12
     Memory: 131.0M
     CGroup: /system.slice/docker.service
             └─865 /usr/bin/dockerd -H fd:// --containerd=/run/containerd/conta>
[output clipped]
OK, the Docker container is running! Now let’s actually create a container and see how it works:
A Simple Container
devil@ubuntuVM:~$ sudo docker run -p 80:80 nginx
[sudo] password for devil: *********
Unable to find image 'nginx:latest' locally
latest: Pulling from library/nginx
b4d181a07f80: Pull complete
edb81c9bc1f5: Pull complete
b21fed559b9f: Pull complete
03e6a2452751: Pull complete
b82f7f888feb: Pull complete
5430e98eba64: Pull complete
Digest: sha256:47ae43cdfc7064d28800bc42e79a429540c7c80168e8c8952778c0d5af1c09db
Status: Downloaded newer image for nginx:latest
/docker-entrypoint.sh: /docker-entrypoint.d/ is not empty, will attempt to perform configuration
/docker-entrypoint.sh: Looking for shell scripts in /docker-entrypoint.d/
/docker-entrypoint.sh: Launching /docker-entrypoint.d/10-listen-on-ipv6-by-default.sh
10-listen-on-ipv6-by-default.sh: info: Getting the checksum of /etc/nginx/conf.d/default.conf
10-listen-on-ipv6-by-default.sh: info: Enabled listen on IPv6 in /etc/nginx/conf.d/default.conf
/docker-entrypoint.sh: Launching /docker-entrypoint.d/20-envsubst-on-templates.sh
/docker-entrypoint.sh: Launching /docker-entrypoint.d/30-tune-worker-processes.sh
/docker-entrypoint.sh: Configuration complete; ready for start up
[output clipped]
What happened? Docker was told to run a container with an image tagged “nginx”. It looked for a locally-stored copy of the container image but could not find it, so it downloaded it from hub.docker.com using the repository library/nginx. Then it executed startup inside the container and displayed all of the output to the terminal. The docker service also created a port mapping that will pass all traffic on port 80 outside the container to port 80 inside the container.
Now, open a browser (Ubuntu installed Firefox by default), and go to http://localhost.
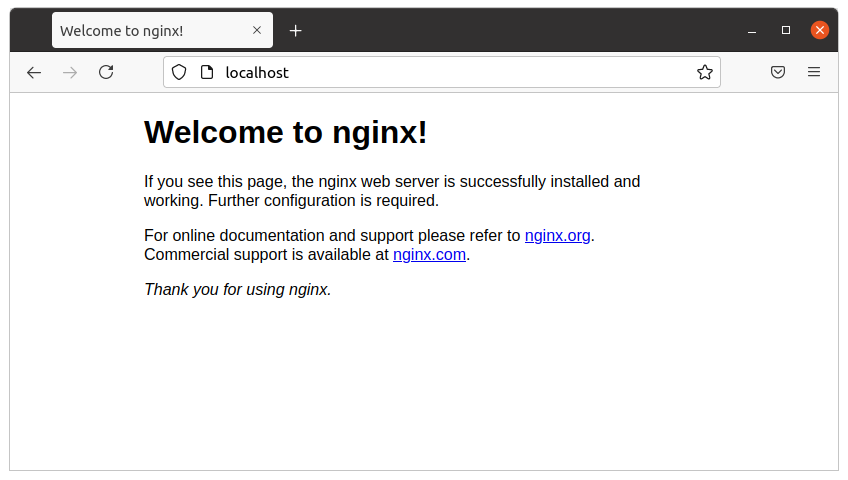
Wow, look at that! I have a web server (nginx), running inside a Docker container, serving a very basic webpage.
Attaching Files to a Container
In the case of the nginx Docker image, it comes with a default page that you see above. It is located inside the container at /usr/share/nginx/html. This is the first time I’ve mentioned files inside containers, so I’ll try to keep it simple. When a container is created, it is populated with files from the associated image. These files are laid out by the container’s creator, and are otherwise inaccessible from outside the container. However, in an effort to maintain flexibility, files and directories from outside (i.e. on the host) can be attached to the container and accessed like they were normally inside.
In this way, a generic container can be created and then attached to a directory with customized content that lives on the host.
For example, let’s say that I have a custom BowTiedDevil web page that I want to serve with a Docker container. We already have the container (nginx), which by default serves content in its /usr/share/nginx/html directory. If I attached my custom page to the container, it would serve it instead of the generic page above.
So here’s what I would do. First, create an index.html file with the following content using nano:
<!DOCTYPE html>
<html>

<head>
    <title>BowTiedDevil's Awesome Page</title>
</head>

<body>
    <h1>Welcome to BowTiedDevil.com</h1>
    <p>If you see this page, you know that the nginx Docker container is properly serving my custom HTML instead of the default. Neat!</p>
</body>

</html>
If you don’t know HTML, don’t worry about it. You can probably guess what the webpage might say just by reading the tags.
Then I run a new nginx Docker container with the following options:
devil@ubuntuVM:~$ sudo docker run -v /home/devil/index.html:/usr/share/nginx/html/index.html -p 80:80 nginx
The option -v is short for --volume, and it instructs the host to overlay the path on the left of the colon (outside the container) above the location on the right of the colon (inside the container).
With that done and the container running, refresh the page in Firefox.
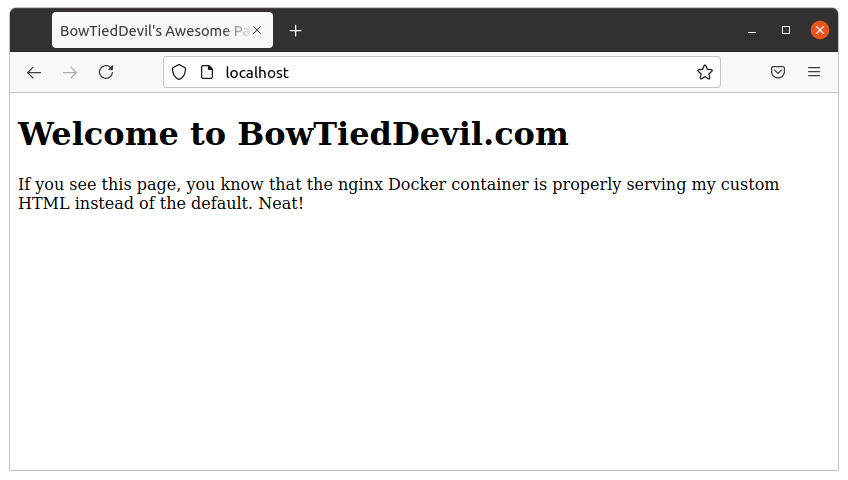
There we go! My custom HTML is visible, since we’ve told docker to overlay the index.html file on top of the default file inside the container (located at /usr/share/nginx/html/index.html). The web server inside the container will serve this overlay index.html without knowing or caring that it’s different.
Wrapping Up
Stop the container with CTRL + c and remove index.html if you want.
I want to leave you with this key takeaway — Docker is a fantastic tool for creating and managing individual services that can be moved, modified, customized, and reconfigured at whim, without making modifications to your base OS. This means that you can stop caring about the base version of Linux that you’re installing (Ubuntu in our case), and concentrate on the containers running the services you care about.
The great trap of running a Linux server is that you begin to treat it like a pet, caring for it and customizing it and applying lots of little fixes here and there. If you’ve worked on it for a long time and need to upgrade, it can be very nerve-wracking. You likely have forgotten some small tweak you’ve made, and debugging a misconfigured service after an upgrade can leave you in a panic especially if that service is mission-critical.
Using Docker allows you to keep the services outside of the normal stream of distribution updates, giving you more flexibility.