In Virtual Machines, I introduced the concept of a virtual machine (VM). To introduce you to Linux, I recommended and showed how to create a dedicated VM to install Ubuntu Linux. I didn’t get into the weeds of the host machine, because early explorations of the file system and CLI would not be bottlenecked by the host machine’s power.
Then I laid out a series of posts (#1, #2, #3) illustrating Docker as a specialized tool to deploy containerized applications quickly and easily.
Next I described the utility of the Traefik Reverse Proxy for protecting Internet-facing services and maintaining SSL certificates in a hands-off way.
Finally I introduced the Domain Name System to illustrate how Internet users interact with servers in an abstract way.
Now I’ll marry the concepts and show how to create your first Virtual Private Server (VPS), point your DNS to that VPS address, then start up a very simple WordPress stack.
If you haven’t already, go to Porkbun and secure a domain name for your website.
Before we begin, let’s learn what a VPS actually is.
What is a VPS?
Recall that a Virtual Machine (VM) is an abstraction of a real computer system. It runs inside of a specially provisioned area, separated from the host operating system (which is running on physical hardware a.k.a. bare metal).
Let’s take the concept of a VM and consider the case of a powerful server machine inside of a data center. It’s common for these high-end machines to have multiple CPUs with multiple cores, many GBs of RAM, and many TBs of storage space.
Since these high-end servers are powerful, and many Internet services are subject to variable demands. So we can assume that the servers are conservatively sized with excess capacity at all times.
Well OK, what should we do with the spare power? Let’s rent it to other people and help reduce the cost of our always-on machine.
Instead of providing access to multiple users on the same operating system, a server will be provisioned with several separate VMs. These VMs are then individually leased to paying users. These virtual machines, accessed entirely remotely, are known as Virtual Private Servers (VPS).
Why VPS?
Using a VPS carries several advantages, compared to building and maintaining your own physical hardware:
- Data centers offer redundancy in power, connectivity, and hardware.
- Using VPS allows you to diversify geographically, spreading servers throughout the world as needed to serve your customers.
- A VPS comes with root access to the server, so you are free to modify the server as you wish. This is typically not possible with a traditional web host, though you will need CLI understanding to interact with the VPS.
- VPS is less expensive than traditional web hosting.
- For the business-minded types, VPS hosting is an operating expense (OpEx). Traditional on-premise servers carry a capital expense (CapEx) component. Depending on your circumstance, a predictable OpEx can be superior to an unpredictable CapEx.
Types of VPS
There are two main flavors of VPS:
- Shared VPS are as described above, except that the servers are typically over-provisioned with more users than available CPUs. This can be just fine if you’re running a low-load server or do not need low-latency performance.
- Dedicated VPS are similar, except that the server is not over-provisioned. You will pay for access to a dedicated CPU (or CPUs) for predictable performance.
Note that you can still purchase dedicated servers without any virtualization applied, but these are high-end items beyond the scope of this post.
Get Started
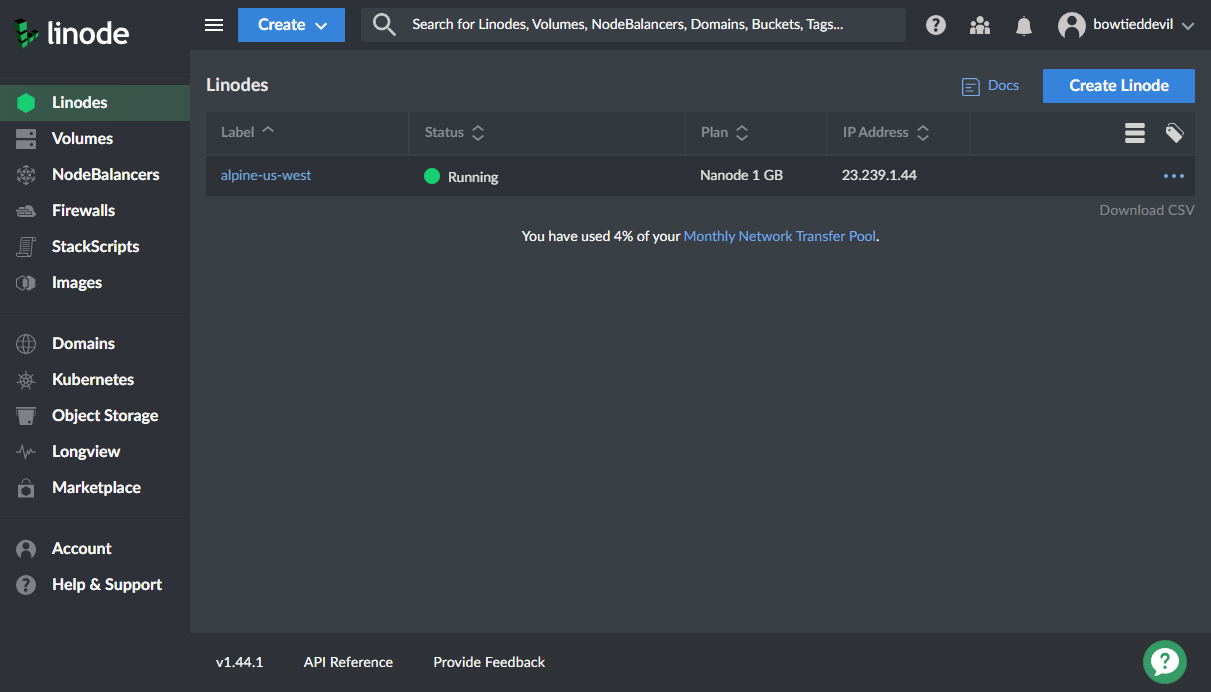
I use Linode for VPS. In fact, this blog and related services operate on a single Shared CPU instance (Nanode 1 GB). If you sign up using my referral link, you will get a $100 credit good for 60 days. Linode will give me a $25 credit on my account, and you won’t pay anything extra. Good stuff!
If you prefer to use another VPS provider, no problem. The process is very similar, and I trust that you can adapt my instructions as needed to your preferred service.
Sign up at the link above, then return here to create your first VPS.
Create the VPS
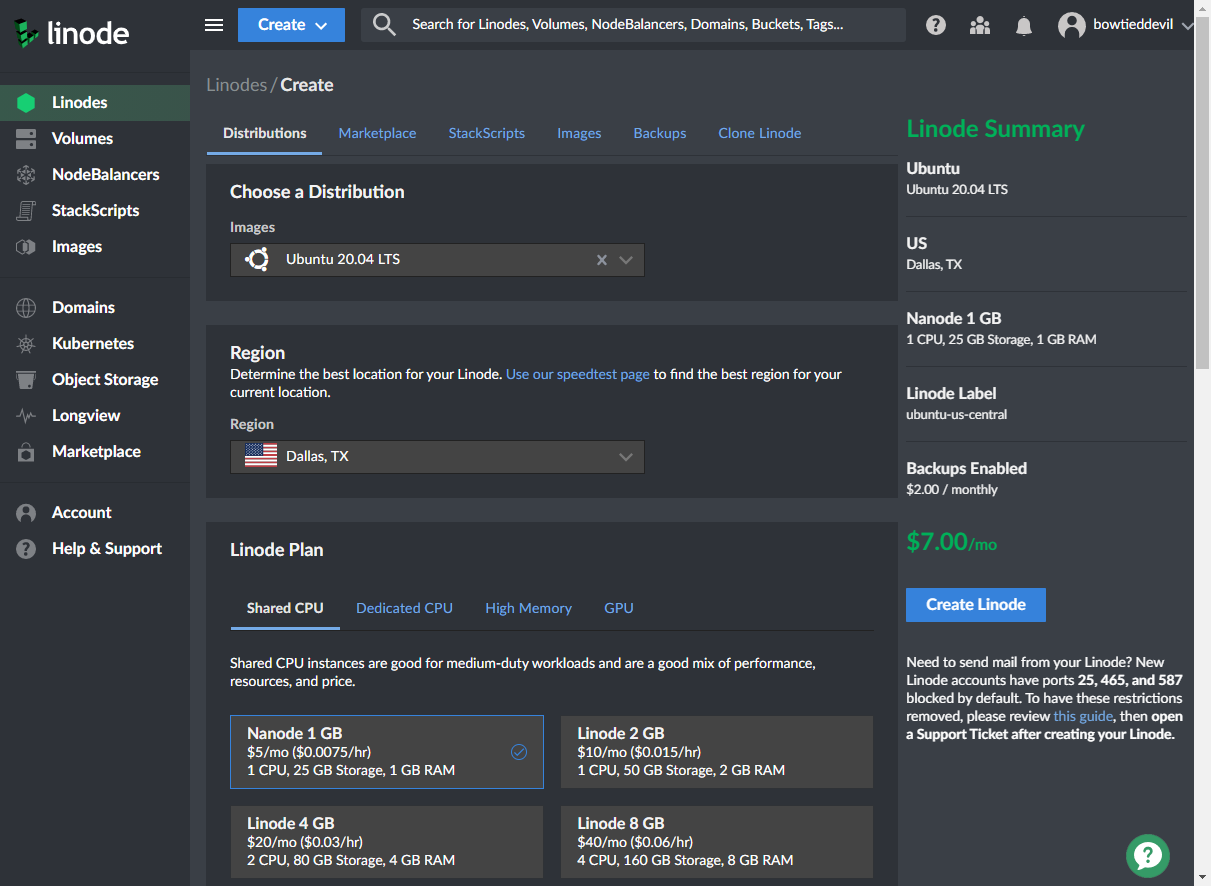
Once you’re signed into the Linode control panel, you’ll see a button along the top row to “Create” various objects. To create a VPS, click the “Linode” link and make the appropriate decisions.
I recommend selecting Ubuntu 20.04 LTS as the base image, since it matches what we’ve already done so far. I will continue to base my posts on this distribution, but feel free to select something else if you want to experiment.
Select a region appropriate for you. For servers that primarily serve websites to customers, I prefer locations in the midwest or southern states to minimize latency across the Continental USA.
A basic blog or static website will be well-served by the lowest-tier VPS (Nanode 1 GB). If you have heavy traffic or need to serve multiple websites, I recommend locating them all on a single higher-powered VPS rather than several lower-powered VPS.
Set the root password, and (optionally) define an SSH key for the root user. You can paste the public key (see previous post HERE) and assign it a name for easy retrieval later.
I recommend enabling the Backup option ($2/month add) for peace of mind. You can easily re-provision a VPS based on an old backup, which makes restoration very simple during an emergency.
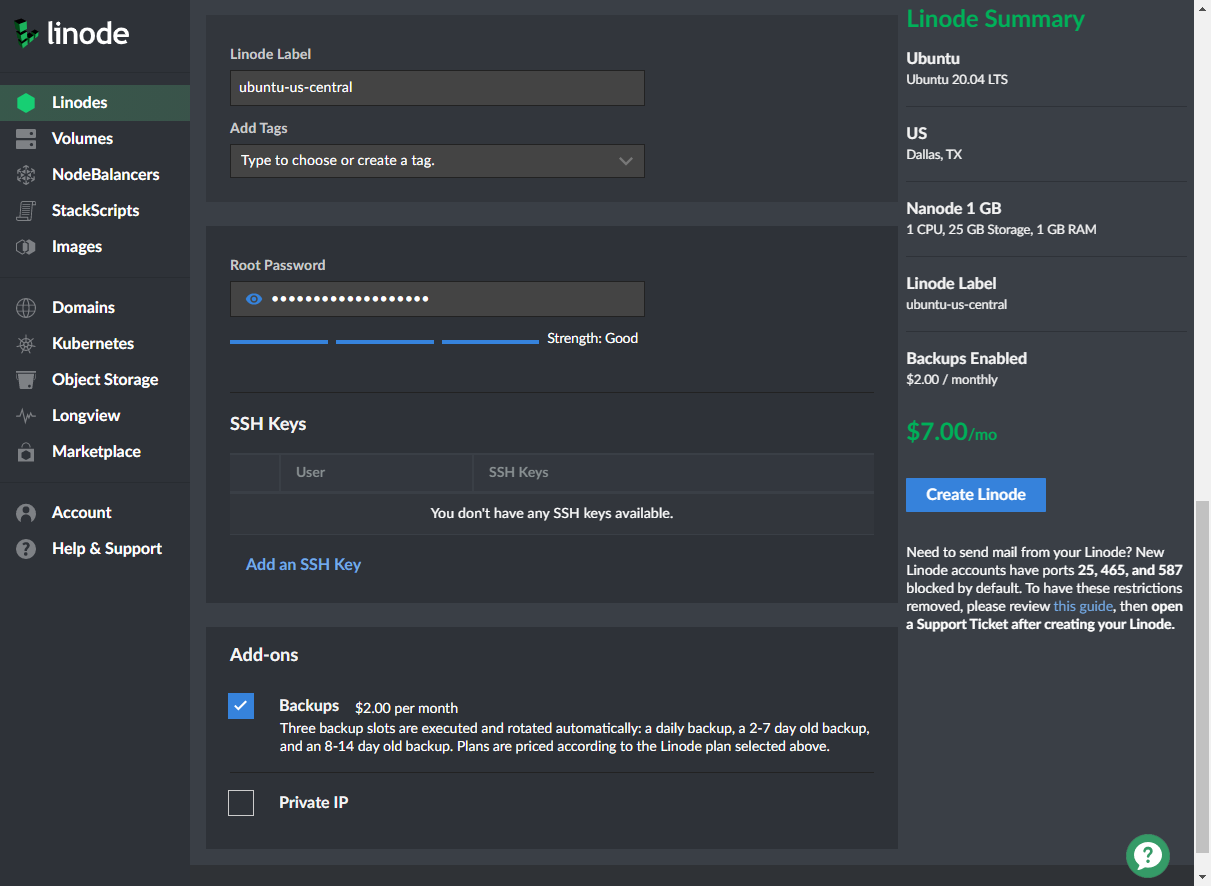
After that’s all wrapped up, click “Create Linode” and wait for the VPS to provision.
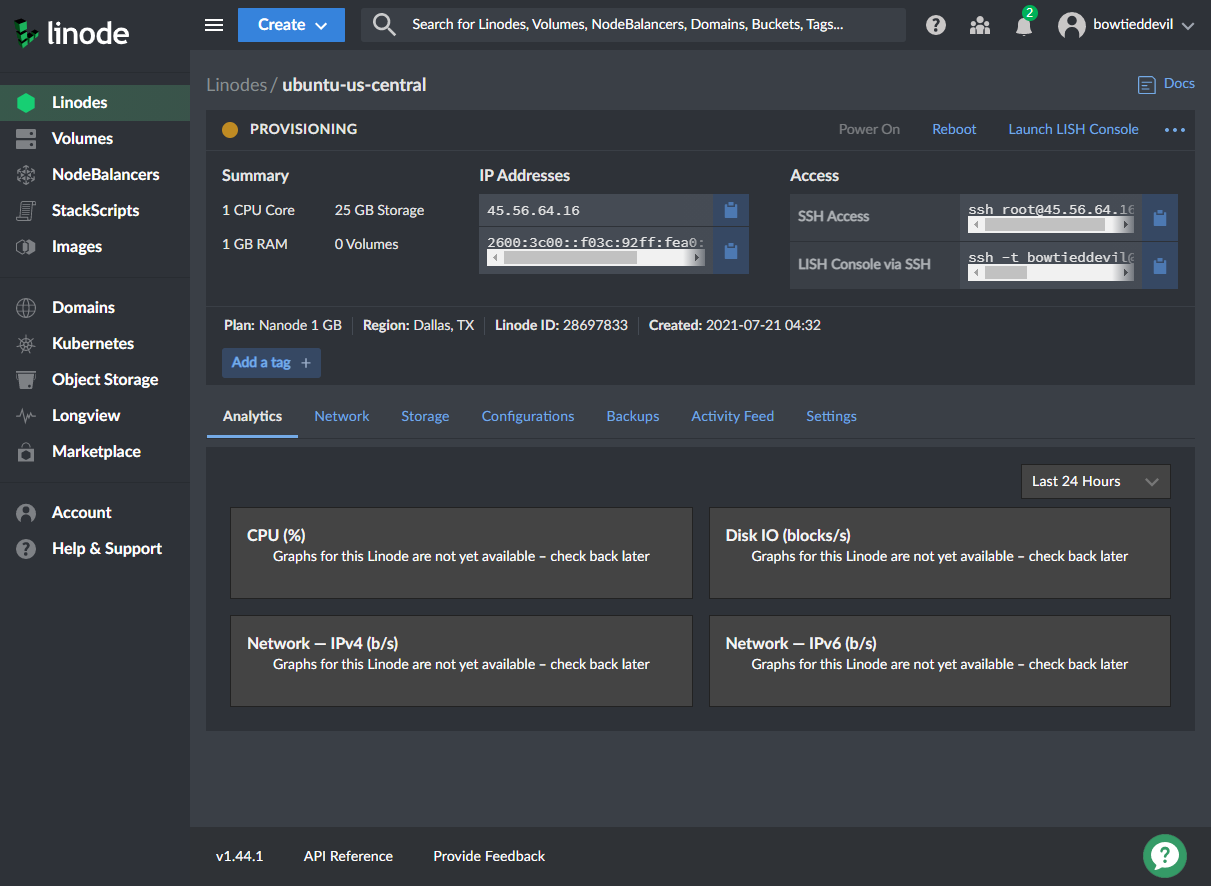
Once that’s done, the “PROVISIONING” label will change to “RUNNING” and you’ll be able to SSH into your VPS. Alternatively, you can access the CLI via a web interface using the “Launch LISH Console” link in the upper right.
Modify the DNS Records
I prefer to use Linode DNS instead of the built-in Porkbun DNS, because my SSL tool can automatically manage my certificates through Linode. Porkbun does not have this feature, so I delegate the DNS to Linode through Porkbun’s interface.
If this didn’t make any sense to you, I’ll simplify. Porkbun can be told that another service will manage the DNS for a particular domain name. In this case, I tell Porkbun to set the authoritative nameservers to Linode. After that, I can interact directly with Linode.
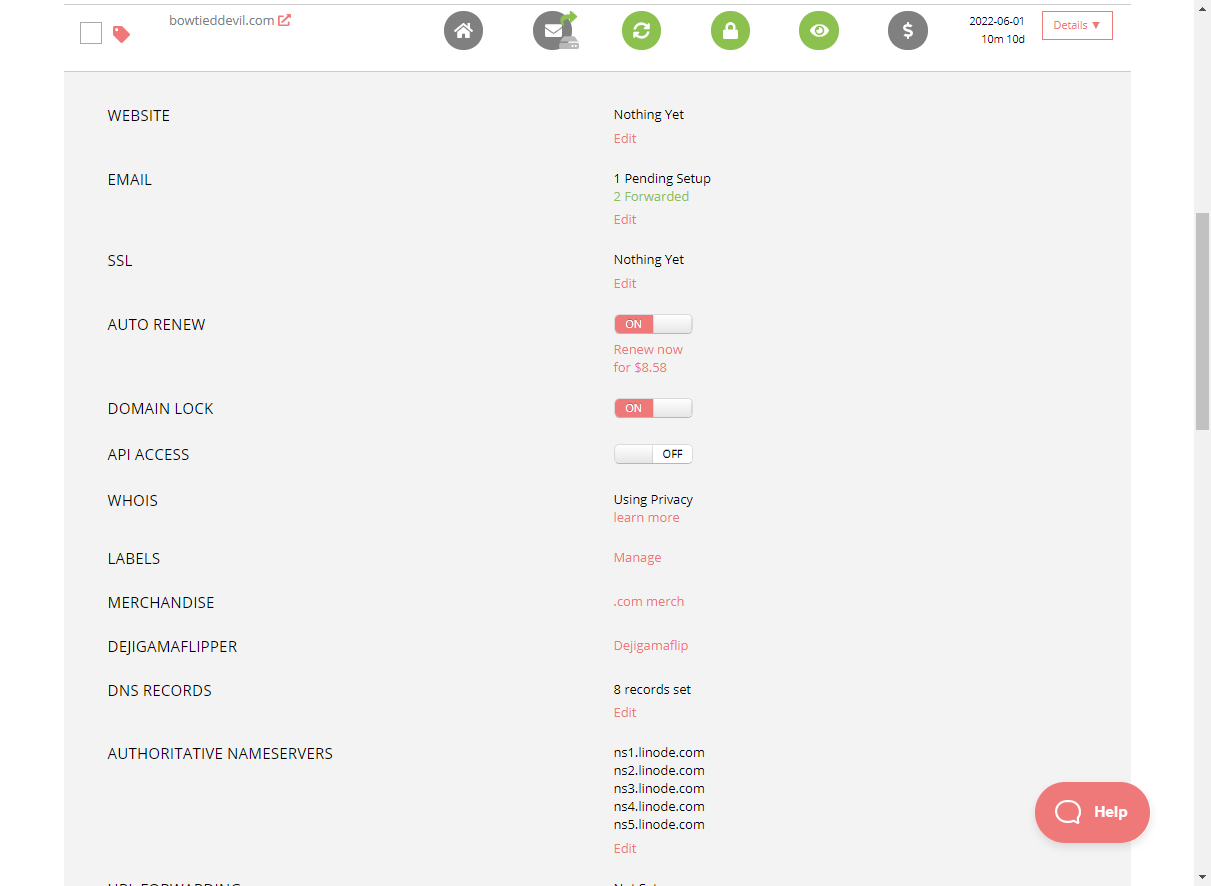
Navigate to Porkbun and find your domain name in the control panel. Click “Details” and edit the “AUTHORITATIVE NAMESERVERS” section to include the Linode DNS servers:
ns1.linode.comns2.linode.comns3.linode.comns4.linode.comns5.linode.com
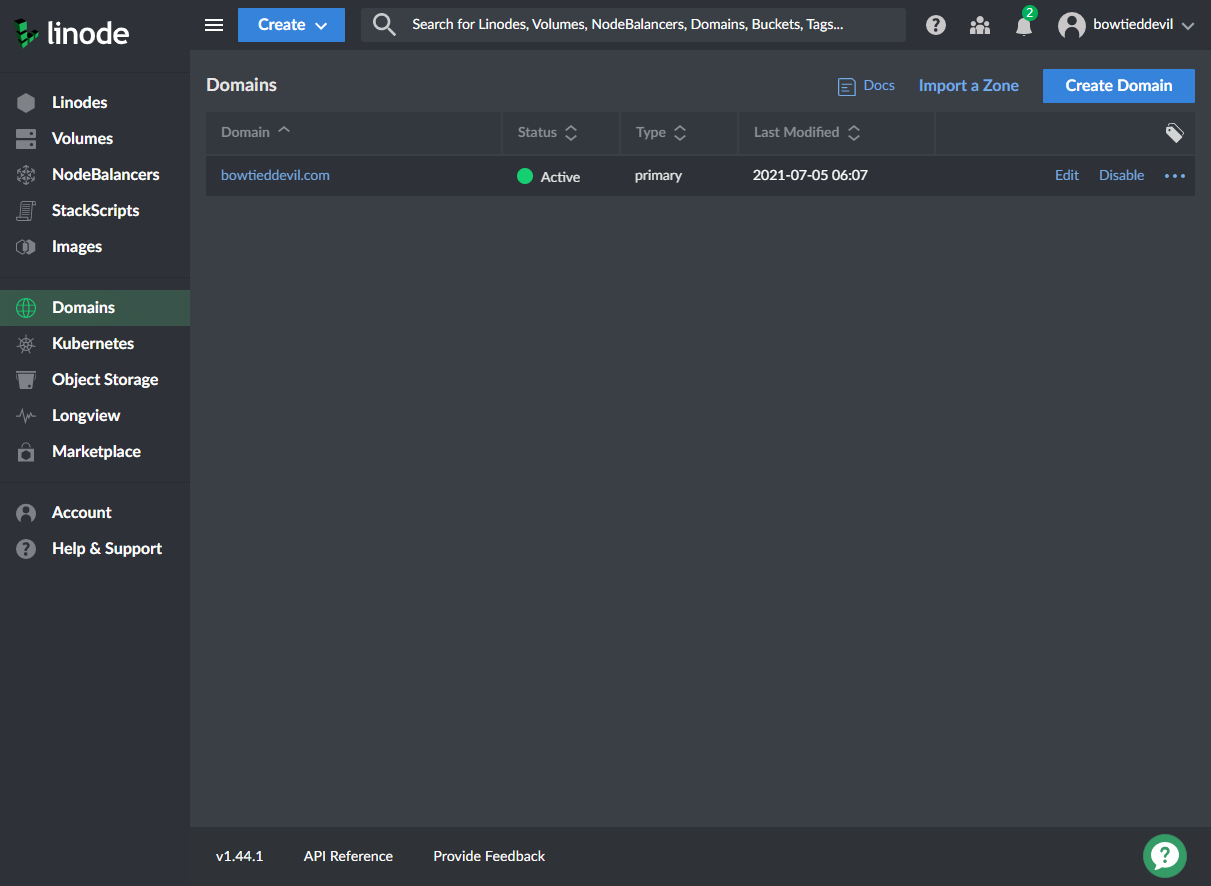
Then move back to the Linode control panel and click “Domains” along the left column.
Create a new Domain and populate it with your address and email address. I recommend selecting the “Insert Default Records” option and choosing the Linode that you’ve just created. This option will update the A, AAAA, and MX records to match the IP address of that VPS. Helpful time saver!
Once that’s done, your Domain panel will look something like this:
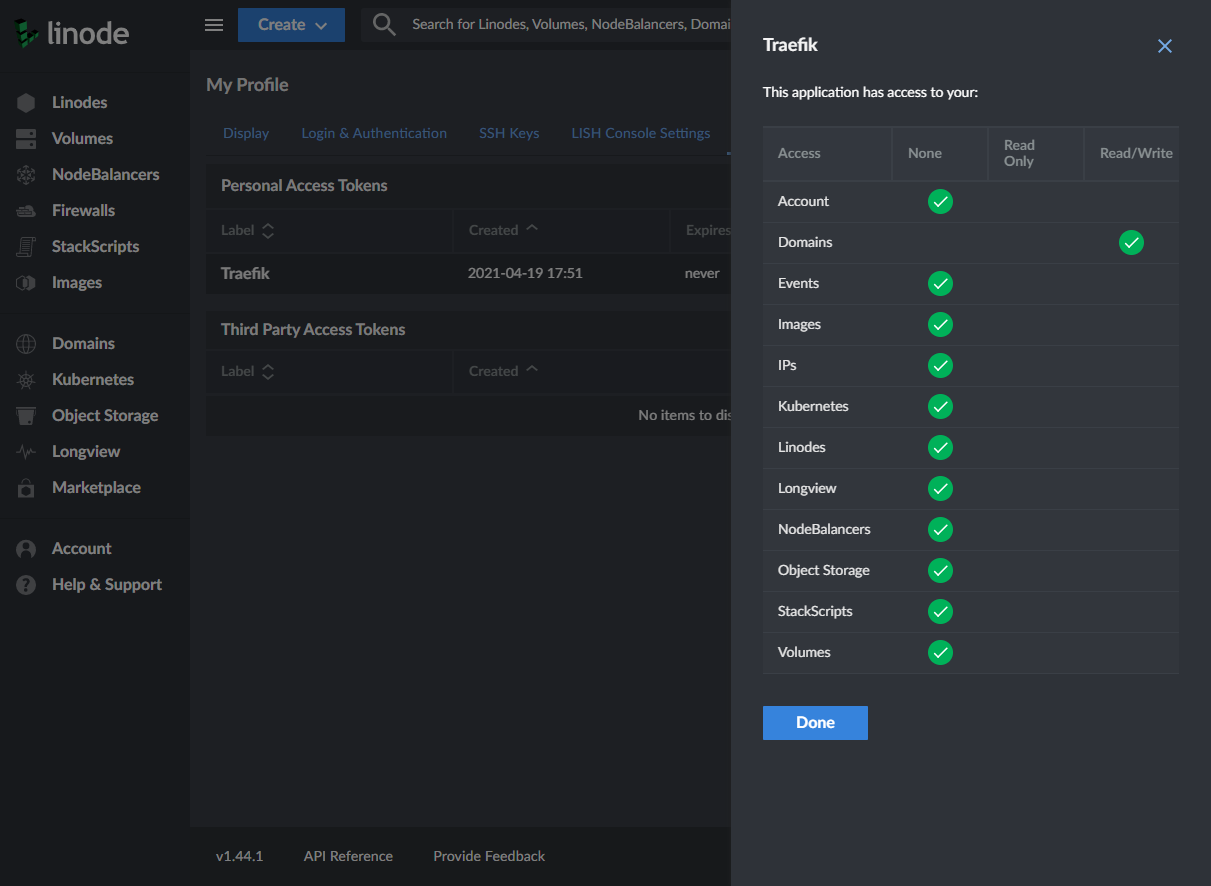
Finally, go to your Profile and create a Personal Access Token to allow Traefik to manage your DNS entries. It needs read-write access to “Domains”, but nothing else. Copy this token somewhere, you will use it later.
Install WordPress and Traefik
Now the VPS is running, and DNS is pointed to that IP address. Open a shell session using SSH or LISH, install Docker, create a docker-compose.yml file for our WordPress / Traefik stack, and then we’re ready to run!
Note that you cannot copy/paste inside of a web terminal session, so I recommend using PuTTY or similar.
From the shell, run the following commands:
apt install docker docker-compose
systemctl enable docker
mkdir /docker
cd /docker
nano docker-compose.yml
Then inside nano, paste the following content:
version: '2'

services:

  wordpress:
    image: wordpress:5.8
    container_name: wordpress
    restart: unless-stopped
    environment:
      - WORDPRESS_DB_HOST=db
      - WORDPRESS_DB_USER=wordpressUser
      - WORDPRESS_DB_PASSWORD=wordpressPass
      - WORDPRESS_DB_NAME=wordpressDB
    volumes:
      - wordpress:/var/www/html
    labels:
      - traefik.enable=true
      - traefik.http.routers.wordpress.entrypoints=websecure
      - traefik.http.routers.wordpress.rule=Host(`example.com`)
      - traefik.http.services.wordpress.loadbalancer.server.port=80

  db:
    image: mariadb:10
    container_name: wordpress-db
    restart: unless-stopped
    environment:
      - MYSQL_DATABASE=wordpressDB
      - MYSQL_USER=wordpressUser
      - MYSQL_PASSWORD=wordpressPass
      - MYSQL_RANDOM_ROOT_PASSWORD=true
    volumes:
      - db:/var/lib/mysql

  traefik:
    image: traefik:v2.4
    container_name: traefik
    restart: unless-stopped
    environment:
      - LINODE_TOKEN=[redacted]
    command:
      - --providers.docker=true
      - --providers.docker.exposedbydefault=false
      - --certificatesresolvers.letsencrypt.acme.dnschallenge=true
      - --certificatesresolvers.letsencrypt.acme.dnschallenge.provider=linode
      - --certificatesresolvers.letsencrypt.acme.email=[redacted]
      - --certificatesresolvers.letsencrypt.acme.storage=/letsencrypt/acme.json
      - --entrypoints.web.address=:80
      - --entrypoints.web.http.redirections.entrypoint.to=websecure
      - --entrypoints.web.http.redirections.entrypoint.scheme=https
      - --entrypoints.websecure.address=:443
      - --entrypoints.websecure.forwardedHeaders.insecure=true
      - --entrypoints.websecure.http.tls=true
      - --entrypoints.websecure.http.tls.certResolver=letsencrypt
      - --entrypoints.websecure.http.tls.domains[0].main=example.com
      - --entrypoints.websecure.http.tls.domains[0].sans=*.example.com
    ports:
      - "80:80/tcp"
      - "443:443/tcp"
    volumes:
      - /var/run/docker.sock:/var/run/docker.sock:ro
      - certs:/letsencrypt

volumes:
  certs:
  db:
  wordpress:
Note: I have edited several labels and variables above with [redacted] and example.com or similar. Change these to match your domain and email address! Nothing will work otherwise.
Test and Verify
Execute docker-compose up in your shell and wait for a message similar to db_1 | Version: '5.7.34' socket: '/var/run/mysqld/mysqld.sock' port: 3306 MySQL Community Server (GPL). When that’s done, kill the stack with CTRL + c and re-run with docker-compose up -d.
Then navigate to example.com (changed to match your domain) and finish the WordPress installation.
And there you go! A fully functional WordPress installation at your new domain name, protected by an SSL certificate.
Pretty good deal for $5/month.